KRISTIN, IF YOU'RE READING THIS BEFORE YOUR PARTY SATURDAY NIGHT, STOP! DON'T SPOIL THE SURPRISE!!!!
ok well, you might remember in the months of september, i vowed to NOT SPEND ANY MONEY for a whole month. well, last month i went a little overboard and i think another swearing off spending is in order for the month of february. although its only 4 days into this month and i've already spent $30 in korean stickers- more on that later- and a bottle of nail polish and floral wire.. ok ill just stop there. EEPS! :-S well this project cost me NOTHING! :) but its from the heart and it turned out super cute so i know she'll love it. ;) the only thing i spent money on was that i got her a disposable camera to go with it. $3.50. i can live with that.
*clears throat* okie dokie then. well TRYING to be frugal, here's what i made, a photo album, posing with one of the cute handmade owls that the lovely Brina gave me in the Surprise Ball Gift Swap a while back. <3
cute, right? want to make one? well here's how! :D
Materials:
- cardboard
- fabric
- fabric glue
- ribbon
- eyelets and eyelet tool
- clear plastic page protectors
- scrapbook paper
- sewing machine / needle + thread + patience
- scrapbook paper
optional for decoration:
- fabric paint
- felt
- small beads
- embroidery thread
the back cover is 5 X 8 inches, and the front is two parts so it has a hinge. the larger part is 5 X 6 1/2 and the smaller part is 5 X 1 inch. i poked 3 holes in the small part, and 3 holes in the back cover. make sure they line up!
next, chose your fabric. i chose solid pink with a striped pattern on the inside. the fabric for the outer cover should be roughly 8 X 9 1/2. just as long as you have enough to fold over, really. i cut the fabric for my inner cover the same size as the cardboard, 5 X 8. for the inner fabric, cut out the corners, pin about a half inch inside, iron and sew. (fabric scraps i had laying around for over a year - $0)
yeah, i know it's crooked. i eyeballed this project. i wasnt exact on everything. :]
ok so now you have your covers (front and back, inside and outside) all cut out. time to make 'em pretty! :D
you can do whatever you want for this step, but i chose to use felt and spell out PICS with beaded and embroidered detail. these are all things i had on hand. $0. booyah.
cute cute cute.
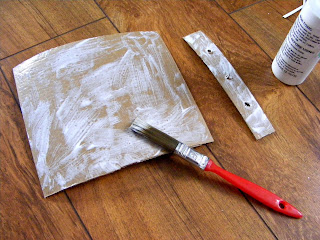
i embellished the inner covers with a little fabric paint. i taped off sections and brushed over it with gold fabric paint. i tried one with stripes and one with zig zags. i liked the zig zags :]
next, spread fabric glue all along the cardboard out to the edges. place the cardboard on the fabric, centered. make sure when you glue on the front cardboard (the two pieces)that the gap between then is 1/2 inch, so together they are as long as the back cover, 8 inches. and keep in mind that you'll need to glue the 1 inch cardboard to your left side, since you're glueing it to the wrong side. so once you turn it over it'll be on the right.. i know that should go without saying, but hey, its something i would do. :-P
now cut the corners out of the outer cover fabric and glue the flaps in.
now cut the corners out of the outer cover fabric and glue the flaps in.
next, glue on the inner covers. i shifted mine over so it would be easier to poke holes through the pink fabric for the binding.
now you'll need to add the eyelets for the binding. this part was tricky. just make sure you make your holes big enough to put the eyelets through where they won't get tangled in the fibers of the fabric.
the way eyelets work is this: they come with a little shaped piece of metal, and another one that's a little longer. you put your eyelet between them and hit it with a hammer. the two pieces bend the back of the eyelet down and hold it into place. if that doesn't make sense, there are instructions on the package of eyelets. and they're cheap. like $2.50 for a 24 pack with the special metal pieces included.
well, your cover is DONE! :D mine got a little warped and wrinkly.. :( so sad.
now for the inside. cause it's what's inside that counts, right? riight?
for this part i took regular page protectors and cut them down to 5 X 8 inches.
now stitch up the bottom and right side. make sure you leave the top open so you can slide in paper and pictures. the left side won't matter because it will be bound with ribbon at the end.
i decorated the edges of some of the page protectors with sharpie and stamps. (if you use stamps, make sure you use the Stayzon brand. other brands won't dry on the plastic and will just smear. ew.)
i also added a few random pages of paper and magazine pictures so my friend can journal on them.
now the binding part is rather tedious, but don't give up now, you're so close! :D
the hole punch i had didn't punch a clean hole through the plastic. it more like, popped it? so i had to add each page one by one and kind of struggle with it. but it was worth it. :] tie ribbons in bows and finish ends with fray-stop or clear nail polish. cute, right?
what it looks like with photos. this is one of a good friend of mine with my kitty when she was a baby. *aaaw she was so cuuuuute!!!*
a journaling page
another journaling page
warning: this project is likely to make your room look like this!
gaaaah! D:
wasn't that fun? gift wrap and card tutorial coming tomorrow! ;) stick around.


Ooh... LOVE, LOVE, LOVE it!!
ReplyDeleteI want to make one for myself now. I have SO MANY crafting supplies, I wouldn't have to buy a thing for this project! :D
And thank you for featuring my little owl in your photograph! How sweet, <3
Good to see you back in blog world!
ReplyDeleteThis is such a cute crafty gift idea -- photo albums are such a treasure of a present!